Mapping
Mapping Actions allow connecting data from one platform with that of another, ensuring that each field is in the correct format before actual sending to the destination platform.
In practice, mapping allows you to rename, add, or remove fields automatically, without manual interventions or external code.
Configuration
By accessing the Action detail page, you can:
- Modify the Action name.
- Update settings.
- Test the mapping.
- Save the changes made.
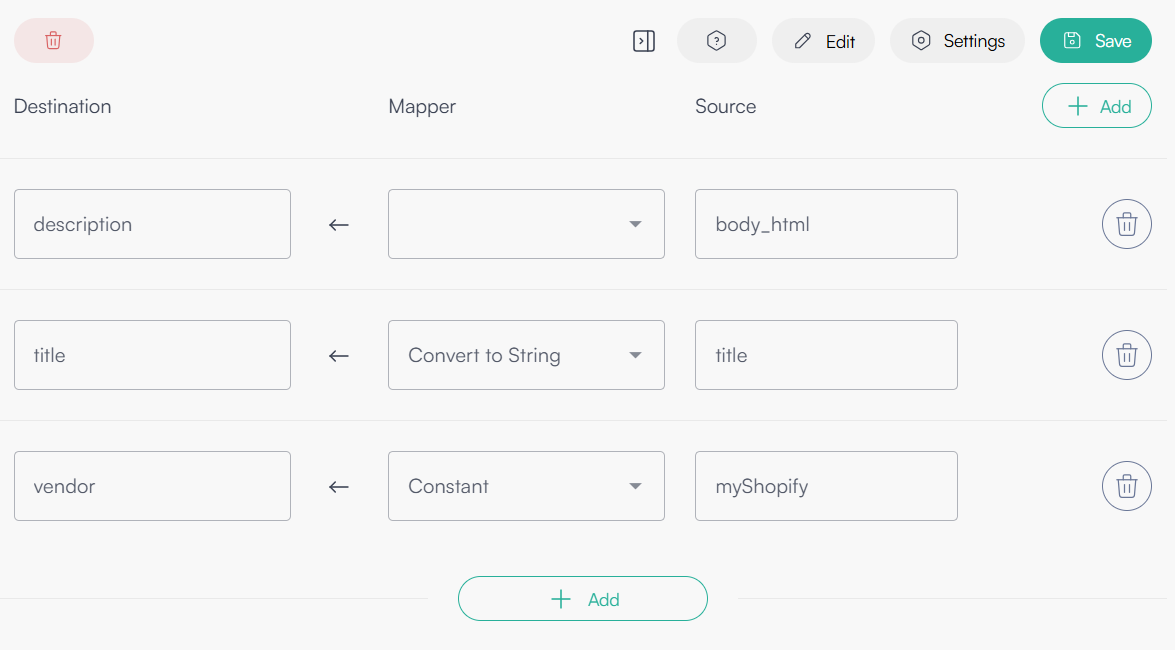
Figure 1: Action detail page for mapping configuration
Through the Settings button, you can:
- Import an input JSON to facilitate mapping.
- Import an example output JSON.
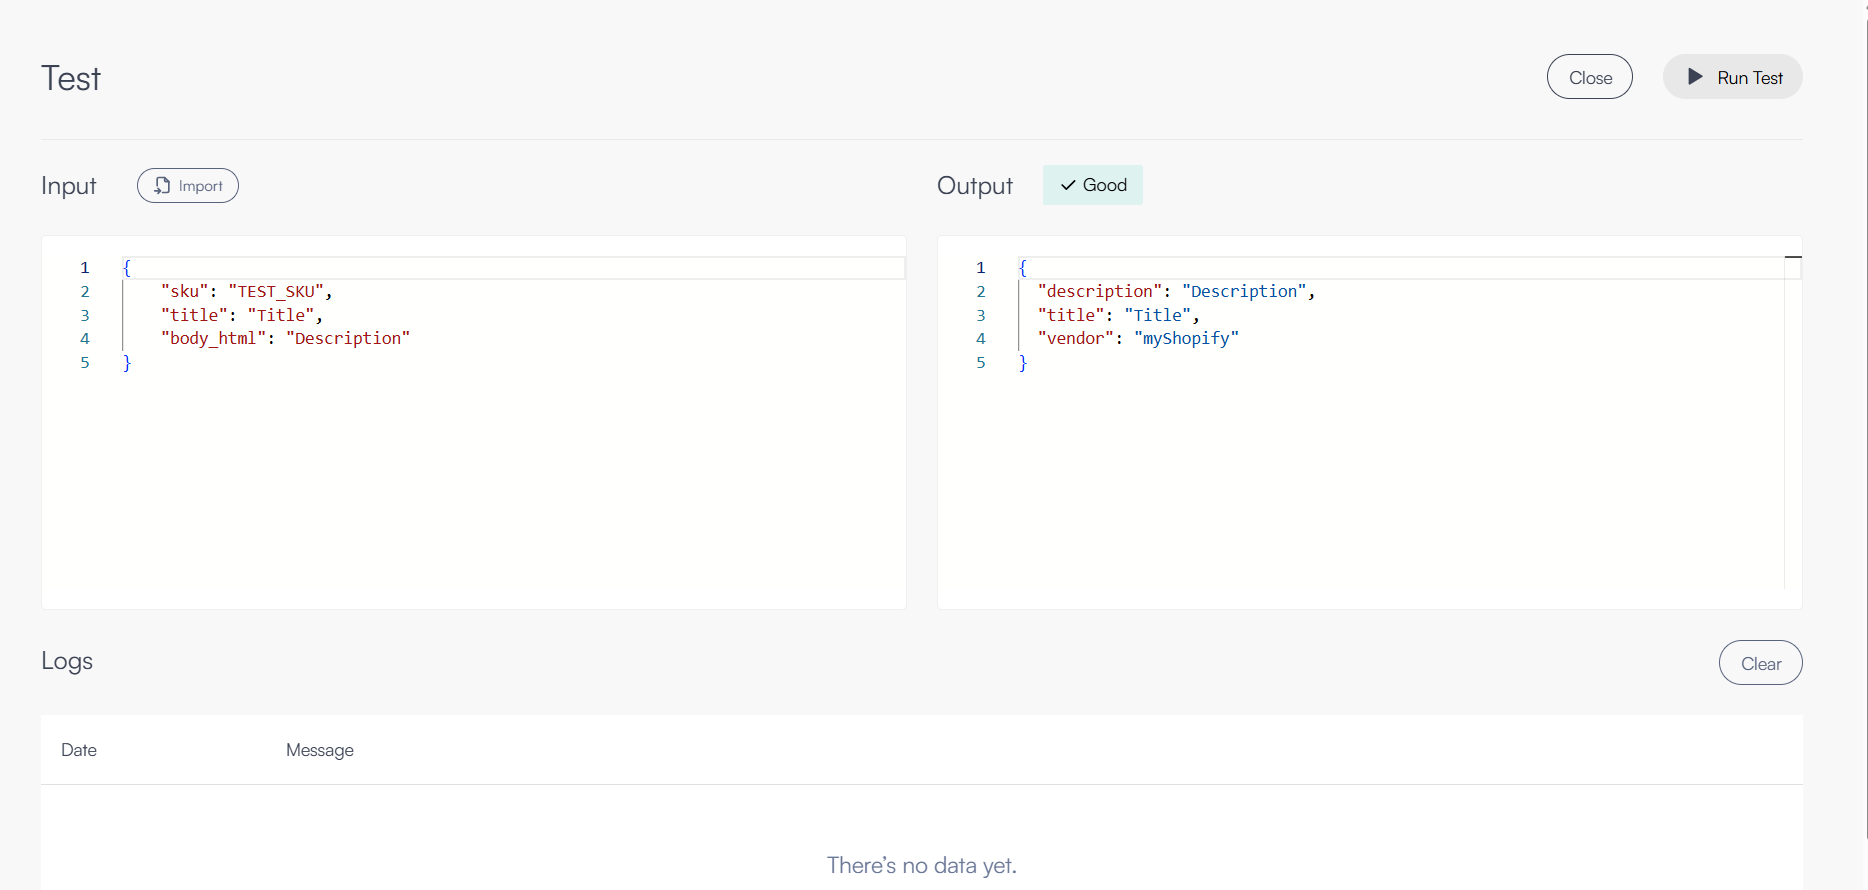
Figure 2: Settings panel for importing input and output JSON examples
Mapping definition
- Click Add for each field you want to include in the output.
- Select the field from the dropdown menu or enter it manually.
- Define a mapper rule for each field, choosing between:
convert to int→ conversion to integerconvert to decimal→ conversion to decimalconvert to string→ conversion to stringconstant→ define a constant value'-'→ no conversion
Note: as also visible from the table header, the order of fields is: Destination → Mapper → Source.
Testing
Once the mapping is defined, you can test it by providing an example input JSON.
- Before running the test, all changes made must be saved.
- The platform will report any errors, allowing you to correct them immediately.
💡 Tip: always run a test with a small data sample before applying the mapping to the entire flow.

Figure 3: Testing interface for mapping with input JSON
Benefits
- Ensures data consistency between platforms.
- Reduces manual errors.
- Facilitates automatic integration between different systems.